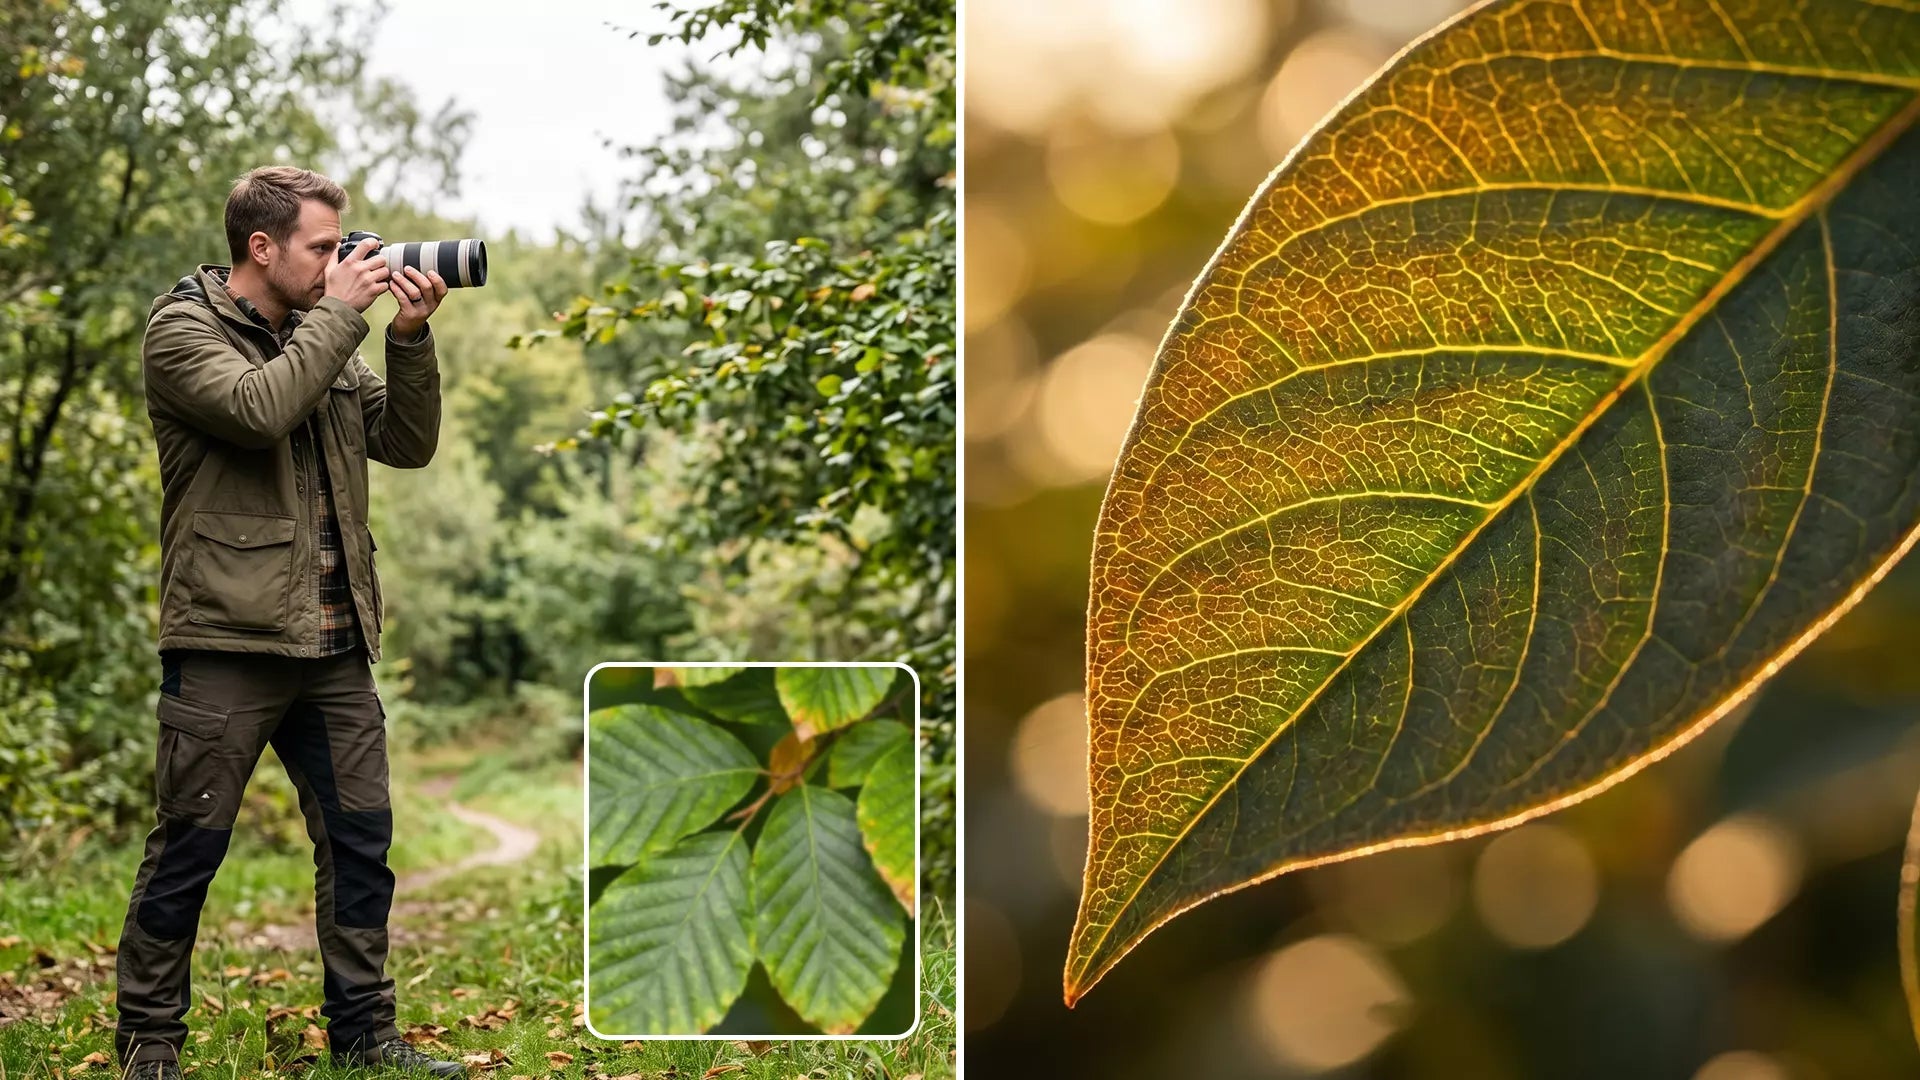
Leaf Vein Photography Is About One Thing: Detail

Most people shoot plants like landscapes.
That’s the mistake.
Leaf vein photography is about:
- Texture
- Structure
- Patterns
- Light interaction
You’re not capturing a leaf.
You’re capturing the architecture of nature.
What Actually Works for Leaf Vein Photography Outdoors

You don’t need a DSLR.
You don’t need a studio.
You need control over distance, stability, and lighting.
Here’s what moves the needle:
-
Get extremely close
If you’re not seeing veins clearly, you’re too far. -
Use magnification (100x–400x range)
This is where details start to pop. -
Stabilize your shot
Hand shake kills sharpness. -
Shoot in soft light
Early morning or shaded areas work best. -
Look for contrast
Damaged leaves, thick veins, or backlit leaves win every time.
Step-by-Step: How I Capture Leaf Vein Shots That Actually Look Good

No theory.
Just what works.
Step 1: Find the right leaf
Don’t shoot random plants.
Look for:
- Visible vein patterns
- Slight imperfections
- Interesting shapes
Flat leaves = boring photos.
Step 2: Get closer than feels normal
This is where most people fail.
I used to stop too early.
Now I go until:
- The veins fill the frame
- The texture becomes obvious
That’s where the magic is.
Step 3: Lock the camera
If your image is blurry, nothing else matters.
Use:
- A small tripod
- Or a stable surface
Even slight movement ruins macro detail.
Step 4: Control the light
Harsh sunlight destroys detail.
What works:
- Shade
- Cloudy weather
- Indirect light
Pro tip:
Backlighting a leaf makes veins glow.
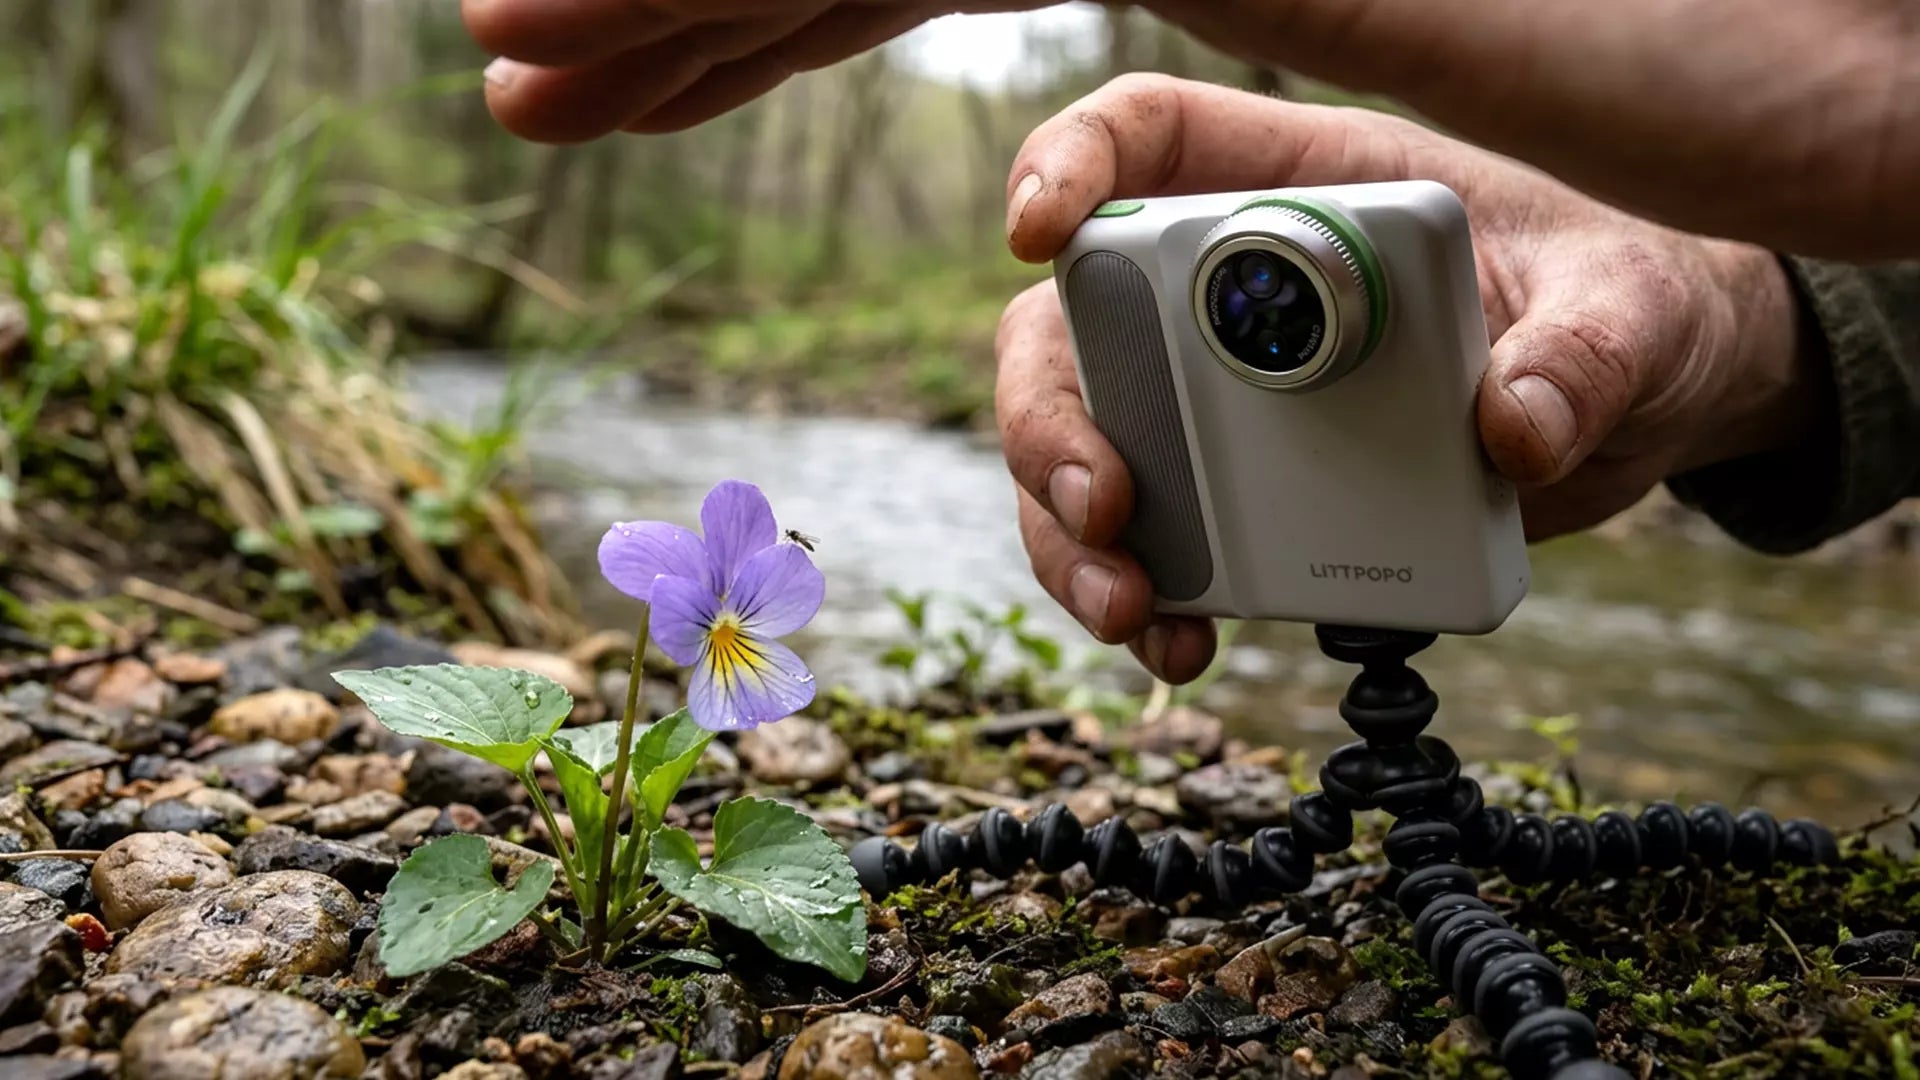
Step 5: Use a microscope camera (this changes everything)
This is where tools matter.
With something like MicroCam X1, you can:
- Zoom into microscopic textures
- Capture fiber structures
- Shoot handheld without losing clarity
That’s the difference between “nice photo” and “what am I looking at?”
Real Example: What Changed My Results Instantly
I used to shoot plants on hikes.
Wide shots.
Normal angles.
Nothing special.
Then I tried shooting one leaf up close.
Not macro.
Microscopic.
Suddenly:
- Veins looked like road systems
- Textures looked like fabric
- Details I never noticed became the subject
Same park.
Completely different content.
Where to Shoot Leaf Vein Photography (Best Outdoor Spots)

You don’t need exotic locations.
Start here:
- Parks
- Gardens
- Hiking trails
- Your backyard
Best environments:
- Moist areas (better texture)
- Dense greenery (more variety)
- Places with layered lighting
Internal Resources You Should Check Next
If you’re serious about this, don’t stop here:
- Macro plant texture photography guide
- Outdoor micro photography tips
- Best handheld microscope cameras for nature
(These are your natural internal linking opportunities.)
FAQs About Leaf Vein Photography
Is leaf vein photography hard for beginners?
No.
It’s easier than traditional photography.
You just need to get closer and stay steady.
Do I need a professional camera?
No.
A microscope camera or macro-capable device is enough.
What magnification is best?
100x–400x is the sweet spot.
That’s where details become visible but still usable.
When is the best time to shoot?
Morning or late afternoon.
Soft light = better texture.
Why do my photos look blurry?
Most likely:
- Too much movement
- Not enough stabilization
- Shooting too far away
Final Thought on Leaf Vein Photography
Leaf vein photography isn’t about better gear.
It’s about seeing what most people ignore.
Once you start noticing detail, everything changes.
And that’s exactly why leaf vein photography stands out.