
Have you ever watched a video of clouds racing across the sky, a flower opening in seconds, or an entire construction project appearing to happen almost instantly?
That's time lapse.
Time lapse photography is a simple but surprisingly powerful way to show changes that normally happen too slowly for us to notice. Instead of recording continuous video, you capture a series of individual photographs at set intervals and then play those images back as a video.
The result is a compressed version of time.
A sunset that takes an hour can become a 20-second clip. A flower that takes several hours to bloom can appear to open in just a few seconds. A construction project that takes months can be reduced to a short sequence showing the entire transformation.
But what exactly is the time lapse meaning, and how do you actually create one?
Let's break it down.
What Is Time Lapse Photography?
 In simple terms, time lapse photography is the process of taking photographs at regular intervals and combining them into a video that makes time appear to move much faster.
For example, imagine photographing a busy city intersection once every two seconds for 30 minutes. You would end up with hundreds of individual images.
When those images are played back sequentially at a normal video frame rate, all of that activity is compressed into a much shorter clip.
This is different from simply recording a video and speeding it up.
In traditional time lapse photography, the camera captures individual still photographs rather than continuously recording video. This approach gives you much more control over image quality, exposure and the final sequence. Adobe also notes that professional time-lapse workflows commonly start with a sequence of RAW photographs that are later assembled into video.
That is one reason time lapse remains popular among photographers even though almost every smartphone can now create a basic time-lapse automatically.
How Does Time Lapse Work?
The basic process is actually quite straightforward:
Set up your camera → choose an interval → capture a series of images → combine the images into a video.
The important part is the interval.
An interval is the amount of time between each photograph.
If your camera takes one photo every second, you're capturing changes very frequently. If it takes one photo every five minutes, you're compressing a much longer period of time.
The faster your subject changes, the shorter your interval generally needs to be.
For example:
- People walking: around 1–2 seconds
- Moving traffic: around 1–2 seconds
- Fast-moving clouds: around 1–3 seconds
- A sunset: several seconds
- Stars and the Milky Way: often much longer intervals
- Plant growth: minutes or longer
- Construction: several minutes or even hours
These aren't strict rules. The ideal interval depends on how quickly your subject changes and how you want the final footage to look. Adobe gives similar interval examples for subjects ranging from cars and clouds to stars and city sunsets.
Why Use Time Lapse Photography?
The biggest advantage of time lapse is that it lets you visualize change.
A normal photograph freezes a single moment.
A normal video shows events happening at roughly real-time speed.
Time lapse does something different: it reveals patterns and movements that are normally too slow to notice.
Nature
Nature is one of the best subjects for time lapse photography.
You can capture:
- Clouds moving across a landscape
- Flowers opening
- Plants growing
- Shadows changing throughout the day
- Sunsets and sunrises
- Stars moving across the night sky
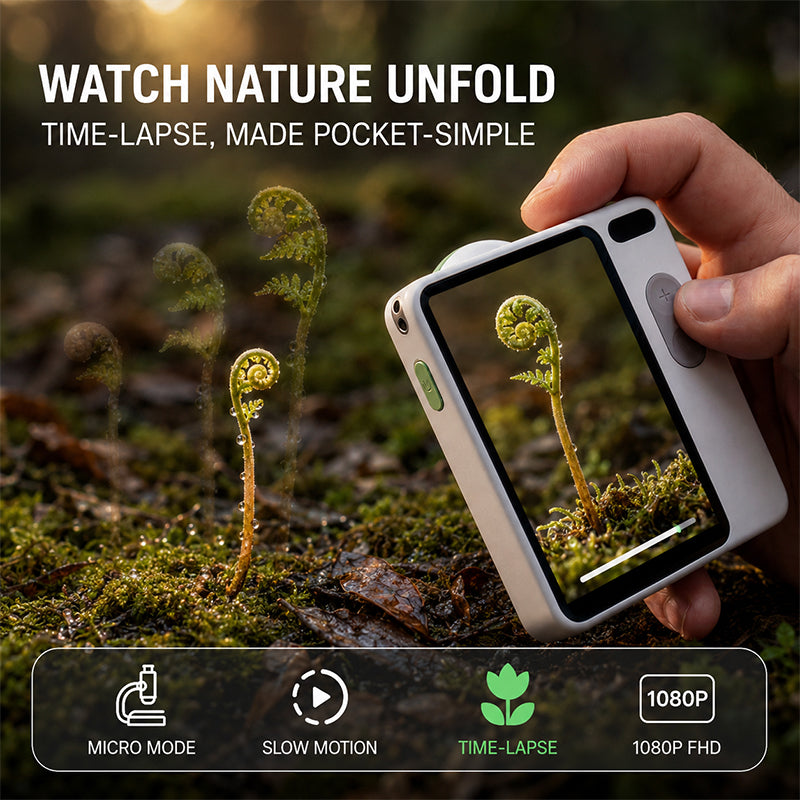
A flower might take several hours to open, but a well-planned time lapse can turn that slow biological process into a few seconds of motion.

Construction
Construction projects are another classic application.
Instead of showing individual stages through hundreds of still photographs, a long-term time lapse can show the entire development of a building or renovation project in a short video.
This is particularly useful for construction companies, architects and property developers because the finished video can visually communicate progress to clients and audiences.
For long-term projects, however, the camera needs to be treated almost like a monitoring system rather than a normal camera. Battery life, weather protection, storage and reliable interval shooting become much more important.
Events
Time lapse can also make crowded events more visually interesting.
Imagine setting up a camera before a concert and recording the venue as people arrive. A few hours of activity can become a short clip showing the entire space filling with people.
The same approach works for weddings, exhibitions, festivals and conferences.
Cities and Travel
City scenes are particularly effective because there is so much movement.
Traffic, pedestrians, changing light and architecture can all create visual rhythm.
This is one reason time lapse is so common in travel videos and landscape photography.
What Camera Do You Need for Time Lapse Photography?
You don't necessarily need an expensive camera.
A DSLR, mirrorless camera, compact camera, action camera or even a smartphone can potentially create a time lapse.
What matters more is whether the device gives you enough control over the shooting process.
For more serious time lapse photography, look for:
- Interval shooting or an intervalometer
- Manual exposure
- Manual focus
- RAW capture
- Good battery life
- A stable mounting system
- Enough storage capacity
- External power support for long projects
Many modern cameras have built-in interval shooting, while others can use an external intervalometer. Nikon, for example, provides dedicated time-lapse functions on many of its cameras, allowing photographers to specify the interval and shooting duration.
For short creative projects, an action camera can be much more convenient.
For a construction project lasting several months, however, a dedicated time lapse camera is usually a better solution.
And if you're interested in shooting extremely small subjects in nature, the equipment requirements change again. Capturing something like an insect or flower requires you to think about focus distance, framing and subject movement in addition to the normal time-lapse settings.
How to Shoot a Time Lapse
 Once you've chosen your camera, the actual process is relatively simple.
1. Choose a Subject That Changes
Start with something that actually moves or changes over time.
Clouds are an easy first project because their movement is obvious.
A sunset is another good option because you can predict roughly how long the sequence will last.
If nothing changes during your shooting period, your final time lapse may simply look like a static photograph with flickering frames.
2. Use a Tripod
This is one of the most important rules.
Don't handhold your camera.
The camera needs to remain in exactly the same position throughout the sequence. Even tiny changes in framing between photographs can make the final video look shaky.
A sturdy tripod is therefore much more important than having the latest camera body. Nikon and B&H both recommend stable camera support when shooting time lapse.
If you're shooting outdoors for several hours, also make sure the tripod is positioned somewhere that won't be accidentally bumped.
3. Lock Your Focus
Autofocus can create problems during a time lapse.
Imagine photographing a sunset with autofocus enabled. As the light changes, the camera may occasionally decide to refocus.
You could end up with one frame that's sharp, followed by another that's slightly soft.
For a consistent sequence, focus manually and leave it there.
This is particularly important when photographing stars, plants or other subjects where the camera may struggle to identify the correct focus point.
4. Use Manual Exposure
Automatic exposure can also create problems.
If your camera changes the exposure from one frame to another, the brightness of your images may fluctuate.
That creates an unpleasant effect known as flicker.
For many situations, manual exposure is therefore preferable because the camera maintains consistent settings throughout the sequence. B&H specifically recommends manual exposure for smoother time-lapse results.
There are exceptions, particularly when shooting from daylight into darkness, but beginners should generally start with manual settings whenever the lighting conditions allow it.
Choosing the Right Time Lapse Interval
 The interval is arguably the most important creative decision you'll make.
Think about how quickly your subject changes.
If you're photographing pedestrians, taking a frame every five minutes would make almost no sense.
If you're documenting a building project, taking one frame every second would generate an enormous number of unnecessary images.
A simple way to calculate your sequence is:
Number of frames = final video length × frame rate
For example, if you want a 10-second video at 30 frames per second:
10 × 30 = 300 photographs
Then consider how long you want to spend capturing those 300 frames.
If you want the camera to shoot for five hours:
5 hours ÷ 300 frames = approximately one frame per minute
This is only a starting point. You may adjust the interval based on how quickly the subject is changing and how much motion you want in the final video.
B&H provides the same basic calculation approach and emphasizes that your target frame rate and desired final clip length should be considered before determining the shooting interval.
Shutter Speed Matters More Than You Might Think
A common beginner mistake is to focus entirely on the interval and ignore shutter speed.
But shutter speed has a major influence on how your final time lapse feels.
A very fast shutter speed can make moving subjects appear frozen in each frame. When those frames are played quickly, movement may look abrupt or jittery.
A slower shutter speed introduces motion blur, which can make moving clouds, traffic and people appear smoother.
This is one reason time-lapse photographers often use a longer shutter speed when conditions allow.
B&H's time-lapse guide explains the relationship between the shooting interval and shutter speed, including the common video-style approach of using a shutter speed around half the interval for smoother motion.
During bright daylight, however, a long shutter speed can easily overexpose your image.
That's where an ND filter can become useful. It reduces the amount of light entering the lens without forcing you to change your desired shutter speed.
Shoot RAW When You Can
If your camera supports RAW capture, it's generally worth considering for more serious time-lapse projects.
Why?
Because you're not just taking one photograph.
You're taking hundreds or potentially thousands.
If the exposure, white balance or color needs to be adjusted later, RAW gives you considerably more flexibility.
There is a downside: RAW files take up much more storage space.
For a short 20-second sequence, that may not matter.
For a project running for several hours or days, storage capacity suddenly becomes much more important.
Adobe also recommends RAW for time-lapse workflows because it provides greater editing flexibility and allows photographers to produce high-resolution final footage from individual still images.
How to Avoid Flicker in Time Lapse
Flicker is one of the most frustrating problems in time lapse photography.
It happens when individual frames have slightly different brightness or exposure levels.
The result is a video that appears to pulse or flicker as it plays.
There are several potential causes:
- Automatic exposure
- Automatic white balance
- Changing artificial light
- Aperture variation
- Inconsistent shutter speed
- Camera settings changing between frames
The simplest starting point is to keep as many settings fixed as possible.
Use manual exposure.
Set a fixed white balance.
Use manual focus.
And avoid accidentally changing the camera position.
This consistency is one of the biggest differences between simply putting a camera into time-lapse mode and deliberately creating a polished sequence.
Time Lapse vs. Hyperlapse: What's the Difference?
These two terms are often confused.
They're related, but they're not identical.
In a traditional time lapse, the camera usually remains in one fixed position while the subject changes.
In a hyperlapse, the camera itself moves between frames.
For example, you might photograph a building from slightly different positions as you walk toward it. When the images are combined, the resulting video creates a moving perspective.
So the simplest distinction is:
Time lapse = time changes while the camera stays relatively still.
Hyperlapse = time changes while the camera position also changes.
B&H uses essentially this distinction when explaining the relationship between time lapse and hyperlapse.
For beginners, I'd recommend mastering static time lapse first. Once you understand intervals, exposure and consistency, hyperlapse becomes much easier to approach.
Creative Time Lapse Ideas to Try
You don't need an elaborate project to start experimenting.
Try one of these:
Clouds Moving Over a Landscape
This is probably one of the easiest first projects.
Find an interesting foreground, lock your camera on a tripod and let the clouds provide the movement.
Sunset Into Night
This is more challenging because the exposure changes dramatically.
You'll need to think carefully about how to handle the transition from bright daylight to darkness.
But when done well, the result can be much more dramatic than a simple sunset photograph.
Busy Street
Place your camera somewhere safe and capture traffic and pedestrians moving through the frame.
A wide-angle lens works particularly well here.
Flower Opening
This is where time lapse becomes especially interesting.
The human eye cannot easily observe a flower opening over several hours, but a time lapse makes the entire process visible.
If you're interested in experimenting with small subjects, you can learn more about time lapse camera setups and techniques for capturing a butterfly sequence.
Construction Progress
For longer projects, choose a fixed composition that includes enough of the surrounding environment to make the changes obvious.
The camera should ideally be mounted somewhere secure and protected from weather.
Common Time Lapse Mistakes
The first few time lapses rarely go exactly as planned.
These are the mistakes I'd watch for most.
Moving the Camera
Even a tiny change can become very obvious once hundreds of frames are stitched together.
Choosing the Wrong Interval
If the interval is too long, movement can look disconnected.
If it's too short, you'll create a huge number of images without necessarily improving the final result.
Leaving Autofocus On
Your camera may refocus unexpectedly and ruin part of the sequence.
Using Auto Exposure
Changing brightness between frames can create flicker.
Running Out of Battery
This sounds obvious, but it's easy to underestimate how long a long-term project will run.
For several-hour or multi-day projects, think about external power before you press the shutter.
Not Checking the Weather
If you're shooting outdoors, a beautiful composition can quickly become a camera disaster if rain arrives and your setup isn't protected.
Final Thoughts: Why Time Lapse Is Worth Learning
The appeal of time lapse photography is that it changes how we see ordinary things.
A cloud moving across the sky isn't particularly dramatic in real time.
A flower opening isn't something you'll normally sit and watch for several hours.
People entering a venue is simply part of an event.
Time lapse turns those slow, ordinary changes into something visually obvious.
And you don't need a cinema camera or expensive production setup to start.
A camera with interval shooting, a tripod and a little planning are enough.
Start with something simple like clouds or a sunset. Learn how the interval affects motion, then experiment with shutter speed and manual exposure. Once you understand those basics, you can move into more ambitious projects such as plant growth, insects, construction or long-term landscape changes.
That's really the time lapse meaning in practice: not simply making a video faster, but using photography to reveal changes that are normally hidden by the passage of time.